Rope safety is paramount in climbing, and knowing how to securely tie a climbing rope is imperative. In this guide, you will learn step-by-step instructions on different types of knots and techniques to confidently tie your climbing rope. Whether you are a beginner or looking to refresh your skills, mastering these knots will give you the confidence to tackle any climbing route.
Key Takeaways:
- Practice makes perfect: Tying a climbing rope is a skill that improves with practice.
- Use a reliable knot: Choose a knot that is secure and commonly used in climbing, such as the figure-eight knot.
- Double-check your work: Always double-check your knot before climbing to ensure your safety.
Understanding Climbing Ropes
The foundation of safe climbing lies in understanding your gear, especially your climbing rope. There are various types of ropes, materials, and factors to consider when choosing the right one for your climbing adventures.
Types of Climbing Ropes
One important aspect to consider when selecting a climbing rope is the type. There are two main types of climbing ropes: dynamic and static. Dynamic ropes are designed to stretch under tension, providing a cushioning effect in case of a fall. Static ropes, on the other hand, do not stretch, making them ideal for activities like rappelling and hauling heavy loads. Below is a breakdown of the different types of climbing ropes:
| Dynamic Ropes | Static Ropes |
|---|---|
| Single ropes (ideal for most climbing situations) | Low stretch and high strength |
| Twin ropes (used in pairs for redundancy) | Minimal stretch, not suitable for lead climbing |
| Half ropes (offer versatility and safety in traditional climbing) | High stretch, best for rappelling and caving |
Though dynamic ropes are the most commonly used in climbing, it is important to understand the characteristics and uses of each type to ensure you choose the right rope for your specific needs.
Materials Used in Climbing Ropes
Understanding the materials used in climbing ropes is crucial for your safety and performance on the rock. Ropes are typically made from synthetic fibers such as nylon, polyester, or a blend of the two. Nylon ropes are known for their high elasticity, making them ideal for absorbing the impact of falls. Polyester ropes, on the other hand, offer less stretch and are more resistant to UV damage and moisture.
Ropes can also be treated with technologies like dry treatments to repel water and improve abrasion resistance. By knowing the materials and treatments used in your climbing rope, you can better assess its durability and suitability for different climbing conditions.
Factors to Consider When Choosing a Climbing Rope
Even after you narrow down the type and materials of your climbing rope, there are additional factors to consider to ensure you make the right choice. Here are some key factors to keep in mind:
- Rope diameter (thinner ropes are lighter but may wear out faster)
- Rope length (choose a length suitable for the routes you plan to climb)
- Impact force rating (a lower rating indicates a softer catch in a fall)
Thou should also consider your climbing style, frequency of use, and budget when selecting a climbing rope. By evaluating these factors, you can find a rope that enhances your climbing experience while prioritizing your safety.
Preparing to Tie a Climbing Rope
Essential Equipment Needed
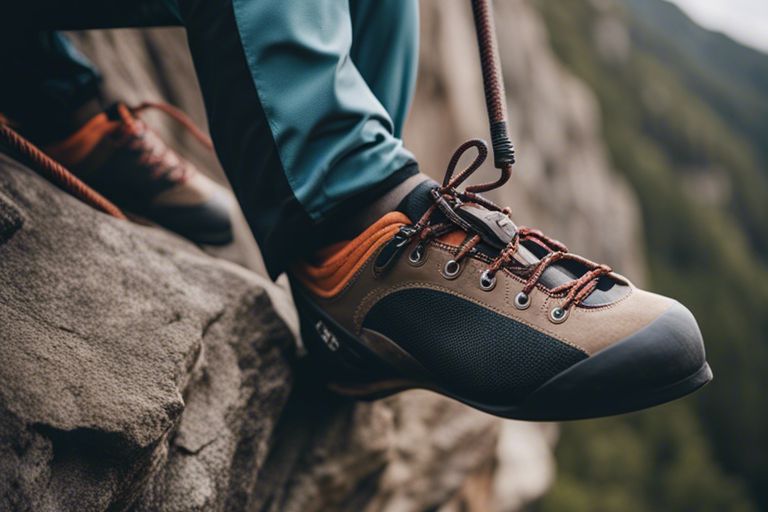
Some important equipment you will need before tying a climbing rope includes a climbing rope (of course), a harness, a belay device, carabiners, and a climbing helmet. Make sure all your gear is in good working condition and properly sized for you.
Safety Precautions to Take
Some safety precautions you should always take before tying a climbing rope include checking the weather conditions, informing someone of your climbing plans, and ensuring you have the proper training and experience to tackle the climb safely.
With More Information about Safety Precautions to Take
With climbing, safety should always be your top priority. Make sure to double-check all your gear, have a clear communication plan with your climbing partner, and always be aware of potential hazards on the route you are about to tackle.
Tips for Inspecting Your Rope
Plus, when inspecting your climbing rope, be on the lookout for any signs of wear and tear such as frayed spots, cuts, or abrasions. Pay close attention to the rope’s core as well, as damage to this part can compromise the rope’s strength.
- Look for any soft spots, which could indicate internal damage.
- Check for any significant discoloration, which might suggest the presence of chemicals or UV damage.
With More Information about Tips for Inspecting Your Rope
The integrity of your climbing rope is crucial for your safety, so it’s important to regularly inspect it before each climb. Recall, a well-maintained rope can mean the difference between a successful climb and a dangerous situation.
- Inspect the entire length of the rope, not just the ends, for any signs of damage.
- Pay attention to how the rope runs through your gear to spot any potential problems early on.
Basic Knots for Climbing
Once again, mastering a few basic knots is crucial for any climber. Knowing how to tie knots correctly can be the difference between a successful climb and a dangerous situation. Here are some crucial knots every climber should know:
The Figure Eight Knot
Some knots are more commonly used in climbing than others, and the figure eight knot is one of the most important. This knot is used to tie into your harness and creates a secure loop at the end of the rope. It’s easy to tie and easy to inspect, making it a favorite among climbers for its reliability.
The Bowline Knot
Even though the figure eight knot is more commonly used for tying in, the bowline knot is another crucial knot every climber should know. This knot creates a fixed loop at the end of a rope and is particularly useful for setting up anchors or attaching a rope to a harness. The bowline is known for its strength and security, making it a valuable knot to have in your repertoire.
Even though the bowline knot is secure, it can become undone if not properly loaded or if the rope is wet. It’s important to always double-check your knots and dress them properly to ensure they are correctly tied.
The Clove Hitch Knot
Eight mastering the figure eight and the bowline knots, adding the clove hitch knot to your skill set is crucial. This knot is commonly used in climbing for attaching a rope to a carabiner or a pole. It’s easy to tie and untie, making it a versatile knot for various climbing situations.
One important thing to remember about the clove hitch knot is that it is not recommended for tying two ropes together, as it can slip under a load. Stick to using this knot for securing a rope to another object rather than for joining ropes.
Tying a Climbing Rope
Unlike other ropes, climbing ropes are specifically designed to bear the weight of a climber and withstand the forces involved in belaying and rappelling. Tying a climbing rope correctly is crucial for your safety during your climbing adventures. There are various knots and techniques that you should be familiar with to ensure that your rope is securely fastened.
Step-by-Step Guide to Tying a Figure Eight Follow-Through Knot
| Rope Management | Knot Tying |
| Make sure your rope ends are equal in length to prevent an uneven knot. | Form a loop with one end of the rope, ensuring the tail end is long enough for the follow-through. |
| Keep the rope flat and parallel as you start tying the knot. | Thread the other end of the rope through the loop from behind and follow the path of the initial rope. |
How to Tie a Bowline Knot on a Bight
An vital knot in climbing, the Bowline Knot on a Bight creates a fixed loop that is reliable and secure. This knot is commonly used for creating a secure anchor point or attaching yourself to the rope with a harness. Learning how to tie this knot is crucial for your safety on the wall.
Understanding the Bowline Knot on a Bight involves creating a loop in the middle of the rope rather than at the end. This loop can then be used for various purposes, such as securing yourself to an anchor or attaching equipment.
Tips for Securing Your Rope
- Always double-check your knots before climbing to ensure they are secure.
- Store your rope properly by coiling it neatly to prevent tangles and knots.
While these tips may seem basic, they are vital for your safety on the wall. Knowing how to properly secure your rope can prevent accidents and ensure a successful climbing experience.
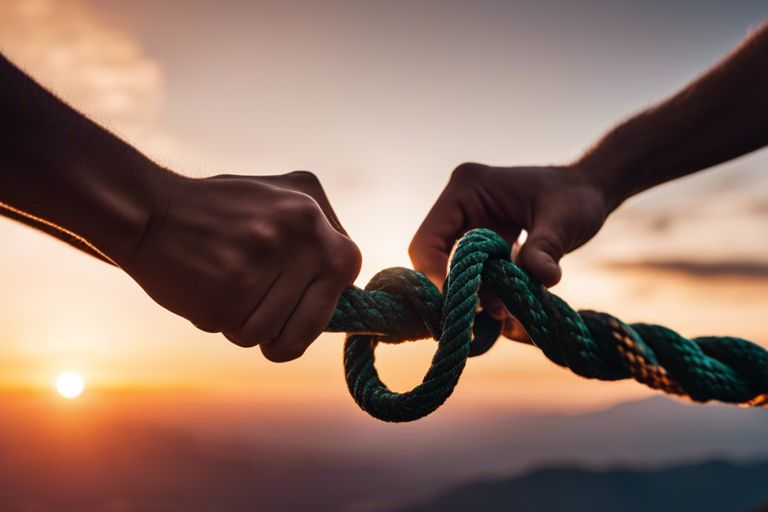
Knot
Remember that your safety is in your own hands when climbing, so always double-check your knots and rope management techniques. Properly securing your rope is vital for a successful and safe climbing experience.
Advanced Climbing Rope Techniques
-
How to Tie a Double Fisherman’s Knot
To tie a Double Fisherman’s Knot, double up your climbing rope to create two parallel strands. Then, starting at the middle point, twist one of the strands around the other three times. Next, thread the end of the twisted strand back through the loop created by the twists. Repeat the same process with the other strand, but wrap it in the opposite direction. Pull both ends to tighten the knot, making sure the wraps are neat and snug against each other.
Little
Assuming you find yourself in a situation where you need a loop in the middle of your climbing rope, the Alpine Butterfly Knot comes in handy. This knot creates a secure loop that can be used for various purposes, such as creating a secure anchor point or attaching yourself to the rope while belaying.
Butterfly
The Alpine Butterfly Knot is particularly useful when you need a fixed loop in the middle of a rope that won’t slip or deform under pressure. This knot is commonly used in rescue scenarios where a climber needs to be lowered or raised with a mechanical advantage system.
Tips for Creating a Secure Anchor Point
- Choose a strong and stable object to anchor your rope, such as a sturdy tree or rock formation.
- Use redundant anchoring systems, like setting up multiple anchor points, to distribute the weight and minimize the risk of failure.
Climbing
After ensuring your anchor point is secure, always test it by applying pressure before fully relying on it to support your weight. This simple step can prevent accidents and ensure your safety while climbing.
This advanced climbing rope techniques are crucial for your safety and success in challenging climbing situations. Remember to practice these techniques regularly to build confidence and proficiency in handling various climbing scenarios.
Troubleshooting Common Issues
Dealing with Rope Twist and Kinks
Your climbing rope may develop twists and kinks over time, especially if it has been coiled or stored improperly. Clearly, when you encounter these twists and kinks, it’s vital to address them before you start climbing. To straighten out the rope, you can run it through your hands from one end to the other, allowing the natural weight of the rope to untwist itself.
How to Handle a Jammed Knot
Jammed knots can be frustrating and pose a challenge when you’re trying to untie them. Jammed knots often occur when there is excessive tension applied or when the knot gets compressed. When you encounter a jammed knot, carefully inspect the knot and try to manipulate it gently to loosen the tight spots.
Jammed knots can be tricky to deal with, but patience is key. If you find yourself struggling to untie the knot, consider using a small tool like a carabiner to help you pry it open without causing damage to the rope.
Factors to Consider When Dealing with Rope Damage
On occasions when you notice any signs of damage on your climbing rope, such as fraying or cuts, it’s crucial to assess the extent of the damage before deciding whether it’s safe to use the rope. Consider factors like the location and severity of the damage, as well as how it may impact the overall strength of the rope.
- Inspect the entire length of the rope thoroughly for any signs of wear and tear.
- Consult a professional if you are unsure about the safety of the rope.
- Remember that a compromised rope can put your safety at risk.
Considering these factors will help you make an informed decision on whether the rope is still safe for climbing or if it’s time to retire it and invest in a new one. Thou must always prioritize safety when it comes to using climbing equipment.
Final Words
Upon reflecting on the process of tying a climbing rope, you now have a better understanding of the crucial steps involved in ensuring your safety while climbing. By following the proper techniques and practicing regularly, you can become more confident in your abilities and enjoy the thrill of climbing to new heights.
Remember to always double-check your knots, communicate effectively with your climbing partner, and prioritize safety above all else. With dedication and attention to detail, you can master the art of tying a climbing rope and launch on exciting adventures with the knowledge that you are well-prepared for any challenge that comes your way.
FAQ
Q: How do I tie a climbing rope onto my harness?
A: To tie a climbing rope onto your harness, you can use a figure-eight follow-through knot. Start by forming a loop with the rope, then pass the end of the rope through the harness belay loop. Bring the rope back up and around, crossing over the standing part of the rope. Finally, pass the end through the loop and tighten the knot securely.
Q: What is the proper way to tie a knot at the end of a climbing rope?
A: The most common knot used to tie at the end of a climbing rope is the figure-eight knot. To tie a figure-eight knot, create a loop with the rope and pass the end of the rope through the loop. Continue weaving the end of the rope around the standing part of the rope and then thread it back through the original loop. Tighten the knot by pulling both the standing part and the end of the rope.
Q: How can I check if my climbing knot is tied correctly?
A: To ensure that your climbing knot is tied correctly, you should perform a visual and tactile check. Check that the knot resembles the expected shape, such as a figure-eight or double fisherman’s knot. Then, tug on the ropes on both sides of the knot to confirm that it is secure and properly dressed. Lastly, verify that there are no twists or tangles in the rope that could compromise the integrity of the knot.