Over time, you may find that taping the blade of your hockey stick significantly enhances your puck control, shot accuracy, and overall performance on the ice. Properly applied tape not only protects the blade from wear and tear but also allows for better grip and handling. In this guide, you’ll learn step-by-step instructions and vital tips to effectively tape your stick’s blade, ensuring that you’re ready to dominate your next game. Get ready to elevate your hockey skills with this simple yet effective technique!
Key Takeaways:
- Preparation: Start by ensuring the blade is clean and dry before applying tape to ensure better adhesion and performance.
- Technique: Apply tape in overlapping layers, starting from the heel of the blade and moving towards the toe, to create optimal grip and control.
- Finish: Consider finishing the tip of the blade with a few loops of tape for added durability and protection against wear and tear.
Understanding the Importance of Taping a Hockey Stick Blade
Your hockey stick blade is a crucial component of your gameplay, and how you tape it can significantly impact your performance on the ice. Taping your blade not only helps with puck control but also allows for better puck handling and shot accuracy. Ultimately, proper taping can enhance your ability to execute plays, receive passes, and take shots, making it an crucial skill for any player looking to improve their game. Understanding this importance will motivate you to take the time to tape your stick correctly and maintain it throughout the season.
Benefits of Taping the Blade
On the ice, the advantages of taping your hockey stick blade are clear. First and foremost, the tape provides a better grip on the puck, which helps you handle the puck with greater finesse. The texture created by the tape allows for enhanced control, enabling you to perform intricate moves with ease. Additionally, a well-taped blade can increase friction, giving you more power when shooting and handling the puck, ultimately elevating your overall game performance.
Another significant benefit of taping is the protection it offers to your blade. Hockey sticks are often subjected to rough conditions, and the tape serves as a barrier against wear and tear from pucks, ice, and even opposing players’ sticks. By preserving the blade’s integrity, you can extend the life of your stick while ensuring that you maintain peak performance throughout its use.
Common Mistakes When Taping
Mistakes can often arise when you are taping your hockey stick blade, leading to less effective results. One of the most common errors is using too little tape; a sparse layer might not provide adequate grip, leaving you frustrated during crucial moments in the game. Similarly, unevenly applying the tape can result in hot spots that may hinder your ability to handle the puck effectively. It’s crucial to ensure you’re wrapping it evenly and with the right amount of pressure for optimal results.
For instance, players new to taping might overlook the importance of covering the toe and heel of the blade, leaving those areas exposed. This can lead to damaging your blade and reducing the overall effectiveness of the tape. Another frequent mistake is failing to consider the amount of tape needed for specific playing styles; players who often take slapshots might require a different taping technique than those focusing on finesse plays. Ensuring you understand these nuances can make a world of difference in both your stick’s performance and your on-ice success.
Selecting the Right Tape
There’s a wide variety of hockey tape available that can greatly affect your game. Selecting the right tape is crucial for maximizing your stick control, durability, and puck feel. With countless options on the market, you want to ensure that you choose the tape that best suits your playing style and personal preferences. Understanding the different types and specifications of hockey tape will help you make an informed decision.
Types of Hockey Tape
One of the first steps in choosing the right hockey tape is to familiarize yourself with the types available. Hockey tape generally comes in two main categories: cloth tape and elastic tape. Each type offers distinct benefits and can be used for various purposes such as securing your stick, enhancing grip, or protecting the blade from damage.
| Type | Description |
|---|---|
| Cloth Tape | Commonly used for wrapping the blade and shaft; provides a strong grip and durability. |
| Elastic Tape | More flexible and stretchable; ideal for securing protective gear and other equipment. |
| Colored Tape | Available in different colors for personal flair or team identification. |
| Water-Resistant Tape | Designed to withstand wet conditions and maintain performance. |
| Foam Tape | Provides extra padding and can be used for injury prevention and support. |
- Consider the playing conditions (indoor vs outdoor) when selecting your tape.
- Think about your personal preferences regarding texture and grip.
- Note whether you prefer the durability of cloth tape or the flexibility of elastic tape.
- Test different colors or patterns to express your individuality on the ice.
- Assume that different types of tape will affect your handling and stick performance uniquely.
Choosing the Right Width and Thickness
Some players may overlook the importance of width and thickness when selecting hockey tape, but these factors can significantly influence your performance. Width typically varies from 0.5 inches (1.27 cm) to 1 inch (2.54 cm) or more, while thickness usually ranges from 0.015 inches (0.38 mm) to 0.025 inches (0.64 mm). Choosing the right dimensions depends on how you like to play and the level of protection or grip you seek.
For example, if you are looking for a better grip and control while handling the puck, you might opt for wider tape that covers a larger surface area on your stick’s blade. Conversely, if you desire a more subtle feel, you could select a thinner tape. Ultimately, you should experiment with different widths and thicknesses to find the option that feels most comfortable and enhances your gameplay.
Tape plays a crucial role not only in how you handle the stick but also in how you transmit energy from your hands to the puck. By choosing the appropriate width and thickness for your playing style, you are setting yourself up for greater success on the ice. Remember that what works for one player might not work for you, so don’t hesitate to try out various combinations to find the right fit for your game.
Preparing the Blade for Taping
Many players often overlook the importance of properly preparing their hockey stick blade before applying tape. Taking the time to ensure your blade is clean and undamaged not only helps the tape adhere better but can also enhance your performance on the ice. Let’s go through the important steps to get your blade ready for that new tape job.
Cleaning the Blade Surface
Little things can make a big difference, and cleanliness is paramount when it comes to taping your hockey stick blade. Start by wiping down the blade with a clean cloth to remove any dirt, dust, or debris. You can also use a little soap and water if the blade is particularly grimy. Make sure to dry it thoroughly afterward, as moisture can prevent the tape from sticking properly. A clean surface will ensure that the adhesive on the tape can bond effectively with your blade.
To take it a step further, consider using some adhesive remover or isopropyl alcohol to ensure that any residue is gone. This extra step can help in achieving an optimal tape application, allowing the tape to last longer and perform better during gameplay. Always make sure your blade is completely dry before moving on to the next step.
Inspecting for Damage
If you find that your blade is damaged, it’s crucial to address any issues before taping. Take a close look at the edges and the face of the blade, checking for any cracks, chips, or significant wear. A damaged blade can affect your puck handling and shot accuracy, making it important to identify any problems that may need fixing or replacements before you invest time in taping.
Damage to the blade not only diminishes performance but can also affect the way tape adheres to the surface. If there are any significant flaws, consider either repairing or replacing the blade to ensure that your tape job does not go to waste. Proper maintenance is key to maintaining the longevity of your equipment and ensuring that you play at your best.
How to Properly Tape the Blade
All hockey players know the importance of a well-taped blade, as it can significantly affect puck control, shooting accuracy, and overall gameplay. When taping your stick, taking the time to do it right can make all the difference. In this section, we will guide you through the steps necessary to properly tape the blade of your hockey stick for optimal performance.
Starting the Tape Application
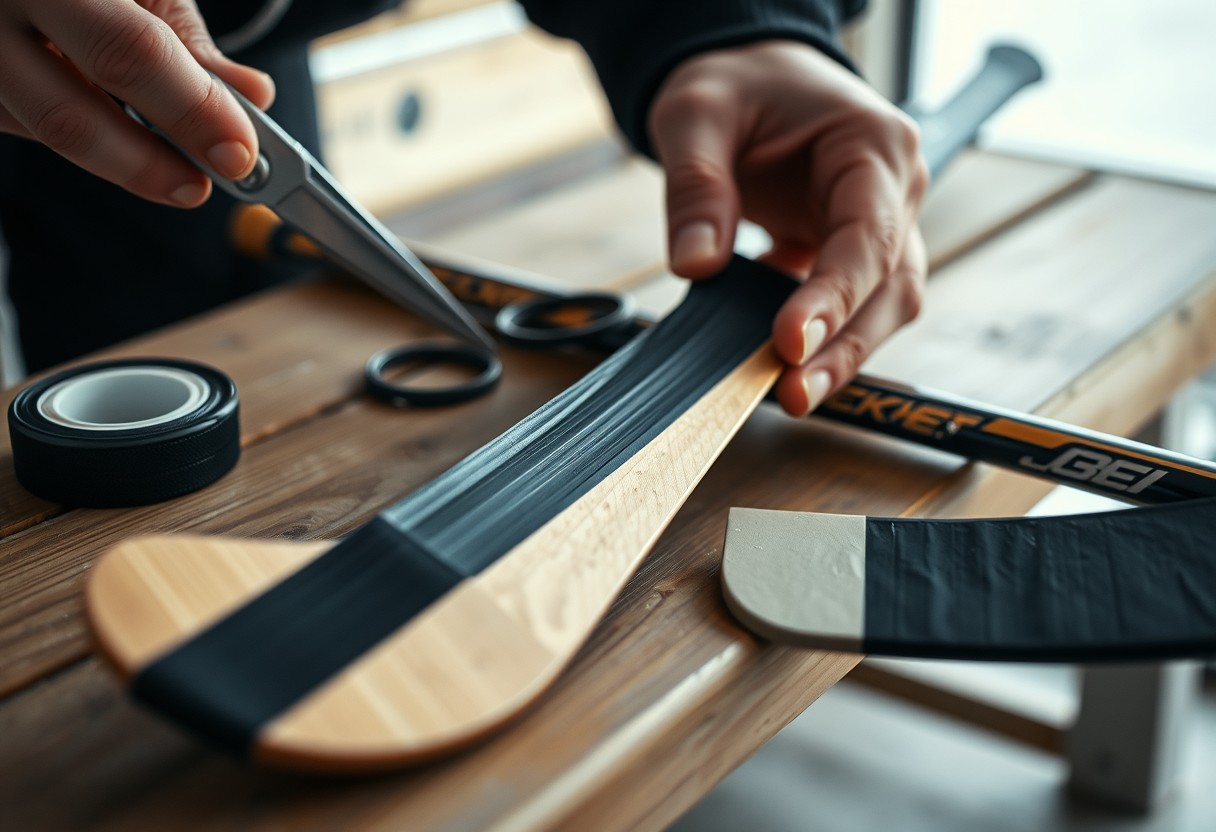
On the first step, you want to start by gathering your materials. You’ll need quality hockey tape, which typically comes in various widths and colors. The most common choice is the standard one-inch tape, but some players prefer thinner options for more customized feel. Once equipped, make sure to clean the blade of your stick thoroughly to remove any dirt and debris that may hinder the tape’s adhesion.
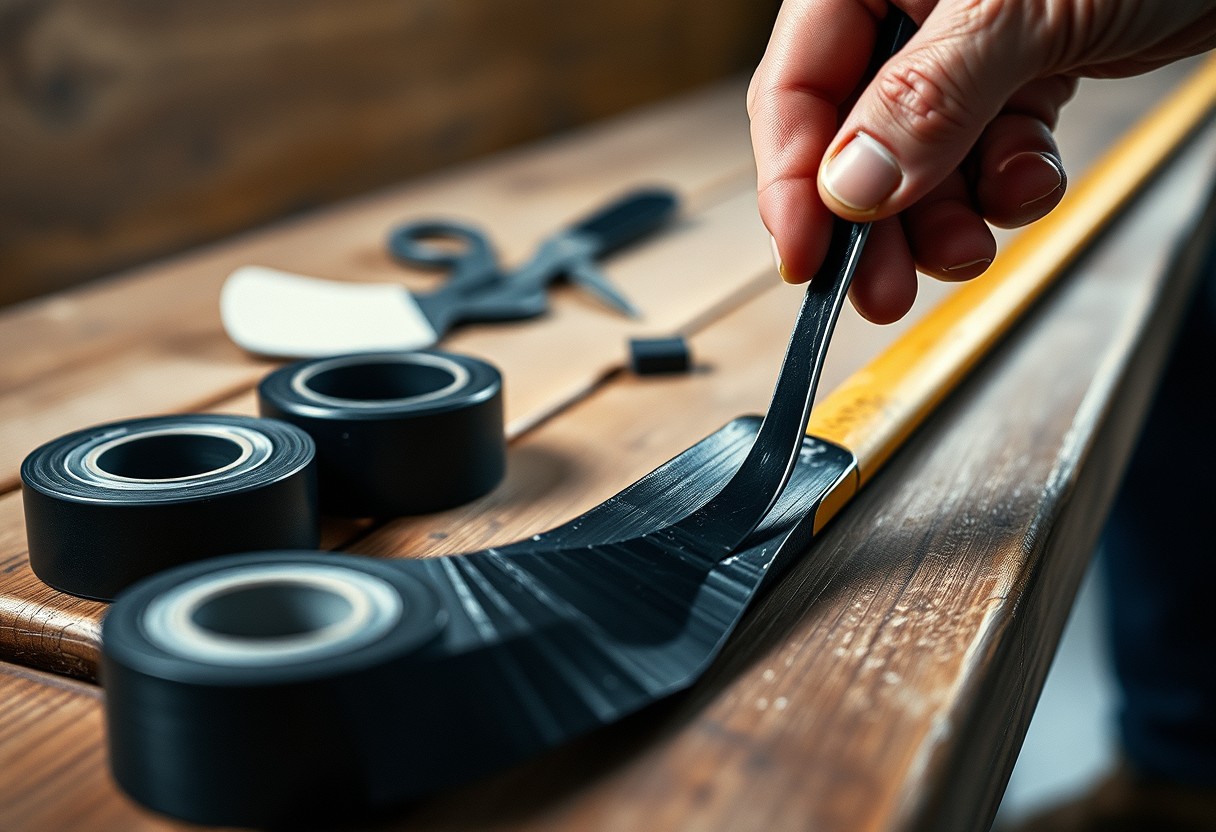
On the blade itself, begin by placing the tape at the heel. The heel is the part of the blade closest to the shaft of the stick. Make sure to apply the tape so that it slightly overlaps the edge of the blade. This will not only improve grip during play but also help the tape to stay in place for longer periods.
Wrapping Techniques
To achieve the best possible results when taping your stick, it’s crucial to apply the tape with the right wrapping technique. Use a firm yet gentle hand when wrapping the tape around the blade. Start at the heel and progress toward the toe, making sure the tape lays flat against the blade without any significant gaps. This will ensure maximum contact between the tape and the puck during gameplay.
This technique allows for more control, as a well-wrapped blade touches the puck more evenly. Additionally, don’t be afraid to adjust the tension on the tape as you wrap. You can keep the tape more snug for better puck feel or allow a bit of slack for a softer touch depending on your playing style.
Overlapping and Overlapping Patterns
One crucial aspect of taping is mastering the art of overlapping. As you apply the tape, make a conscious effort to overlap each layer by about half of the tape’s width. This will create a thicker feel, enhancing your puck control and shot precision. Carefully monitor your overlap to ensure it is uniform, which will contribute to a more aesthetically pleasing and effective tape job.
The key to a good overlap technique is consistency. The more uniform your tape layers are, the less likely the tape will peel or wear prematurely during play. Moreover, an evenly taped blade minimizes any irregularities that can affect the way you handle the puck.
Finishing Off the Tape
Starting the finishing process, you want to make sure that you secure the end of the tape properly. To do this, tear a piece of tape slightly longer than what you need and place it at the toe of the blade. Fold the edge over to create a clean finish that won’t catch or peel back during game play. Be sure to press down firmly to ensure excellent adhesion so that the tape remains intact even under the pressure of intense use.
For instance, you may want to reinforce the toe area by overlapping the last piece of tape with an additional layer for extra durability. This extra layer can be particularly beneficial if you frequently perform slap shots or other high-impact plays that can wear down the tape quickly.
Tips for a Customized Tape Job
After you’ve applied the perfect amount of tape to your hockey stick blade, consider putting a personal touch on your tape job. A customized tape job can not only enhance your unique style on the ice but can also improve your performance. Here are some tips to help you achieve a customized tape job that works best for you:
- Experiment with the amount of tape: Varying the thickness of your tape can change the feel and control you have over the puck.
- Use different brands: Different brands of tape have varying textures and durability; find one that fits your playing style.
- Mix colors and patterns: Be creative and express your personality by using multiple colors or patterns on your blade.
- Adjust the coverage: You can tape only the toe and heel for a different touch or cover the entire blade for more control.
- Consider the tape’s edge: Make sure your tape edges are smooth and without overlaps to ensure a clean release of the puck.
This customization not only helps you stand out but ultimately enhances your on-ice performance.
Utilizing Different Colors
Customized tape jobs can benefit significantly from utilizing different colors of tape. By incorporating contrasting colors, you can establish a unique look that makes your stick recognizable and adds to your personal brand on the ice. For instance, you might choose to use your team colors or select shades that reflect your personality. Moreover, using different colors can help you gauge the wear of your tape, as you can easily identify wear spots or areas that require touch-ups.
In addition to aesthetics, using different colors can serve a functional purpose. For example, lighter colors may reflect sunlight better during daytime games, potentially making it easier for you to see your blade while receiving passes. This blend of functionality and style can translate into improved performance and confidence on the rink.
Creating Texture for Better Grip
Utilizing various tape layering techniques can help create texture that improves grip. By overlapping the tape at different angles or applying multiple layers of tape in certain areas, you can increase traction and feel with the puck. This is particularly beneficial during quick handling and stickhandling maneuvers when precision is key. You’ll find that a textured grip can allow for smoother transitions between puck handling and shooting.
Plus, you can experiment with the spacing of each layer to further customize your grip. For instance, you may want to use wider spacing for a more pronounced texture or tighter spacing for a smoother feel. Whether you prefer a rougher texture for better control or a sleek finish for faster puck release, understanding how to manipulate your tape will empower you to find the perfect combination.
Taping for Specific Ice Conditions
Better understanding the ice conditions you’ll encounter can guide your tape choices for optimal performance. Various ice types can impact your grip on the puck and how you want your stick to perform. For hard ice, a thicker layer of tape can help cushion vibrations and provide stability during slap shots, whereas softer ice might require a tighter grip to avoid losing the puck on slick surfaces.
A strategic approach to taping for specific conditions can greatly enhance your gameplay. In wet or slushy conditions, a rougher texture with a more aggressive tape job can help maintain control as the ice deteriorates. Moreover, adjusting the amount of tape you apply or the thickness of the texture allows you to adapt to whatever situation you encounter. Stay aware of the ice conditions, and ensure your tape job is optimized to keep you at the top of your game.
Factors to Consider When Taping
Not all hockey tape jobs are created equal. To ensure you achieve optimal performance on the ice, you need to consider several factors when taping the blade of your hockey stick. The right taping technique not only improves puck control but also enhances stick durability and personal comfort. Here are some important factors to keep in mind:
- Player position and playing style
- Type of stick and blade curve
- Environmental conditions
Player Position and Playing Style
Now, your player position and playing style significantly influence how you should tape your stick. For instance, forwards may prefer a larger amount of tape on their blades for better puck handling and shooting accuracy, while defensemen may opt for a minimalistic approach to facilitate quick passes and accurate slap shots. Your individual playing style, whether you are more of a finesse player or a power shooter, will also affect your taping method.
You’ll want to mirror your unique techniques with your taping approach. Some players benefit from a textured surface created by the tape for better grip on the puck, while others might want a smooth finish to enhance their shot release. This personalized taping technique is vital in helping you perform to your fullest potential on the ice.
Type of Stick and Blade Curve
Type of stick and blade curve is another pivotal factor in determining how you should tape your blade. The specific characteristics of your stick, including its flex, material, and overall design, play a significant role in how tape interacts with the surface. For example, using a composite stick may necessitate a different taping approach compared to a traditional wooden stick, due to the varying grip and feel during gameplay.
Position your tape depending on your blade’s curvature, as different curves allow for diverse styles of puck handling and shooting. If you have a more pronounced curve, you might want to focus on tapering off the tape towards the toe for better control during wrist shots. Customize your taping technique to complement your blade’s specifications, creating a well-rounded and personalized stick setup.
Environmental Conditions
Now, the environmental conditions you are playing in can greatly affect the effectiveness of your tape job. If you frequently play on outdoor rinks, the moisture and temperature fluctuations may require you to use extra tape or a different brand designed to withstand harsher conditions. Indoor rinks typically offer more stable conditions, but you still need to consider ice quality and humidity.
Adjusting your tape job based on the rink conditions ensures you maintain optimal grip and control over your stick. Thicker applications may be necessary under moist conditions, whereas drier ice may allow for a lighter taping style. Always keep the playing surface in mind when deciding how to tape.
Consider combining these critical elements—your position, stick type, and environmental factors—when deciding how best to tape your hockey stick. Thou will find that a tailored approach to taping creates a better overall playing experience and enhances your performance on the ice.
Maintenance and Replacement of Tape
To ensure your hockey stick remains at peak performance, it’s crucial to understand the maintenance and replacement of the tape on your blade. Proper care and timely replacement can significantly enhance your gameplay by improving puck control, shot accuracy, and overall stick handling. Additionally, maintaining the tape will prolong its lifespan and keep it looking fresh and clean.
When to Replace the Tape
One critical aspect of maintaining your hockey stick is knowing when to replace the tape. You should monitor the condition of the tape, as worn or frayed edges can hinder your performance on the ice. If you notice that the tape has lost its grip, appears dirty or torn, or the adhesive is wearing thin, it is time to consider a replacement. Frequent inspections after practices and games can help you catch these signs early.
Additionally, environmental factors can impact the lifespan of your tape. Contact with water, ice, and even the friction against the puck can gradually wear it down. If you play regularly, it’s wise to set a regular schedule for replacing your tape, such as once a month, or more frequently if you’re engaging in intensive play. This proactive approach allows you to always start with a fresh blade, enhancing your confidence and control on the ice.
Caring for the Taped Blade
The care you provide for your taped blade can significantly affect its durability and effectiveness. After every game or practice, take a few moments to wipe down the taped area with a dry cloth or towel to remove any debris and moisture. This simple step can prevent the buildup of dirt and grime, which can compromise the tape’s adhesive properties and overall performance.
To further extend the life of your tape, consider applying a protective spray designed for hockey sticks. This can create a moisture-repellent barrier that shields the tape from the elements. Additionally, storing your stick in a cool, dry place when not in use will prevent unnecessary wear from humidity or extreme temperatures. By taking these steps, you ensure that your tape remains in optimal condition, allowing you to maintain peak performance on the ice.
Conclusion
From above, you can see that taping the blade of your hockey stick is not just a practical necessity but also a way to enhance your performance on the ice. By following the outlined steps, you ensure that your blade has better puck control and shot accuracy. Note, the application of tape should be tailored to your playing style and preferences, whether you opt for a full wrap or a simpler approach with fewer strips. Don’t be afraid to experiment with different techniques until you find what feels most comfortable for you.
Additionally, keeping your tape in good condition is crucial for maintaining the effectiveness of your stick’s blade. Regularly check for wear and replace the tape when necessary to avoid performance setbacks during games. As you sharpen your skills on the ice, remember that a well-taped blade can make a significant difference, allowing you to play your best hockey. Ultimately, taking the time to tape your hockey stick properly reflects your commitment to honing your craft and excelling in the sport you love.