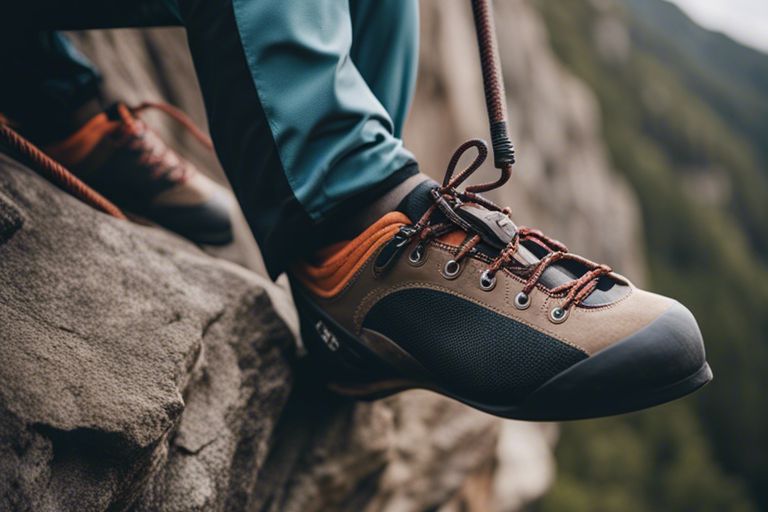
Over the years, you may have noticed how crucial proper finger taping is for maximizing your climbing performance and preventing injuries. In this guide, you will learn the necessary techniques for effectively taping your fingers, ensuring they remain protected while still providing the dexterity you need on challenging routes. From selecting the right tape to mastering the various taping patterns, this post will equip you with the knowledge to safeguard your fingers and enhance your climbing experience.
Key Takeaways:
- Preparation: Clean and dry your fingers thoroughly before applying tape to ensure proper adhesion and prevent skin irritation.
- Taping Technique: Use a figure-eight or spiraling method to provide support and protection while allowing some flexibility for movement during climbing.
- Monitor and Adjust: Regularly check the tightness and comfort of the tape while climbing to avoid restricted blood circulation or excessive pressure on the fingers.
Understanding Finger Injuries
The world of climbing brings with it a myriad of physical challenges, and your fingers often bear the brunt of those demands. Understanding finger injuries is imperative to ensuring your longevity in the sport and optimizing your climbing performance. Climbing places immense stress on your fingers, leaving them susceptible to various types of injuries that can sideline you for significant periods if not managed properly. By familiarizing yourself with the common injuries, you can take proactive measures to tape your fingers effectively and minimize the risk of re-injury.
Common Types of Finger Injuries in Climbing
Finger injuries in climbing can take several forms, impacting both soft tissues and ligaments. Here are the most prevalent types that climbers should be aware of:
- A2 pulley strains
- A3 pulley tears
- Finger tendonitis
- Collateral ligament sprains
- Fractures or dislocations
This list highlights the complexity of finger injuries and underscores the importance of proper care and prevention strategies.
| Injury Type | Description |
| A2 Pulley Strain | Damage to the thin sheath that helps tendons glide smoothly. |
| A3 Pulley Tear | A more severe injury affecting the core structure of the finger. |
| Finger Tendonitis | Inflammation of the tendons due to overuse. |
| Collateral Ligament Sprain | Injury to the connective tissue that supports joints. |
| Fractures or Dislocations | Breaks or misalignments in finger bones, often requiring medical intervention. |
Symptoms and Signs of Injury
Symptoms of finger injuries can vary widely, but there are several common signs to look out for. These can include swelling, bruising, pain during movement, or a general feeling of weakness in the affected finger. You may also experience reduced range of motion or find it painful to grip holds, which can be particularly concerning if you rely heavily on your fingers while climbing. It’s crucial to pay attention to these signs, as they can signal underlying damage that requires rest or medical evaluation.
Recognizing the symptoms of an injury is the first step toward recovery. Even minor discomfort can signal the need for a break or alterations in your training regimen. Ignoring these early warning signs can lead to more severe injuries and prolonged downtime from your climbing activity.
Importance of Proper Tapings
Some climbers underestimate the significance of proper taping techniques for their fingers, but understanding how to tape your fingers can be a game-changer for performance and injury prevention. Proper taping can help stabilize your fingers, offering support to injured areas while still allowing enough mobility to continue climbing. This balance is vital, particularly when you’re pushing your limits and need every advantage you can muster.
Understanding the correct taping method can significantly impact your climbing experience and recovery. The adhesive used, the tension applied, and the specific taping pattern all play roles in how effectively your fingers stay protected during climbs.

Materials Needed for Taping
There’s a variety of materials you need to effectively tape your fingers for climbing. Having the right supplies not only makes the process easier but ensures that you achieve the support you need while preventing injuries. Let’s break down what you’ll need to get started.
Types of Tape: Athletic vs. Climbing Tape
Taping your fingers requires an understanding of the types of tape available. Athletic tape is designed for broad use in sports and can provide moderate support, while climbing tape is specifically engineered for the unique demands of rock climbing. Climbing tape generally has greater flexibility and adheres better to the skin, making it ideal for the rigorous movements involved in climbing.
- Athletic tape: Affordable and versatile.
- Climbing tape: Flexible and skin-friendly.
- Width options: Choose depending on your finger size.
- Adhesive properties: Ensure it sticks well even during sweaty conditions.
- Colors: Available in various colors for personal preference.
Any deficiencies in your tape choice can lead to discomfort or injuries, so it’s crucial to choose wisely.
Scissors and Other Tools
The next items in your toolkit are scissors. Sharp scissors are imperative for ensuring clean cuts in your tape, allowing you to create the lengths and shapes you need for optimal finger support. You may also consider additional tools like a lighter for trimming frayed tape edges, though this is optional.
This attention to the details in your tools can significantly improve the taping experience. A clean cut increases tape adhesion and effectiveness, making your climbing sessions more successful and less prone to injuries from poor taping practices.
Pre-Tape Preparation
An imperative step before applying tape is to prepare your fingers adequately. This includes cleaning the skin thoroughly to remove any oils, dirt, or moisture that could affect the tape’s adhesion. Dry your fingers afterward since dampness can compromise the effectiveness of the tape.
Other factors to consider include checking your fingers for any cuts, bruises, or skin issues that may require additional care or alternative methods. Taking the time for this pre-taping preparation is integral to ensuring a secure and effective application that helps protect your fingers during climbing.

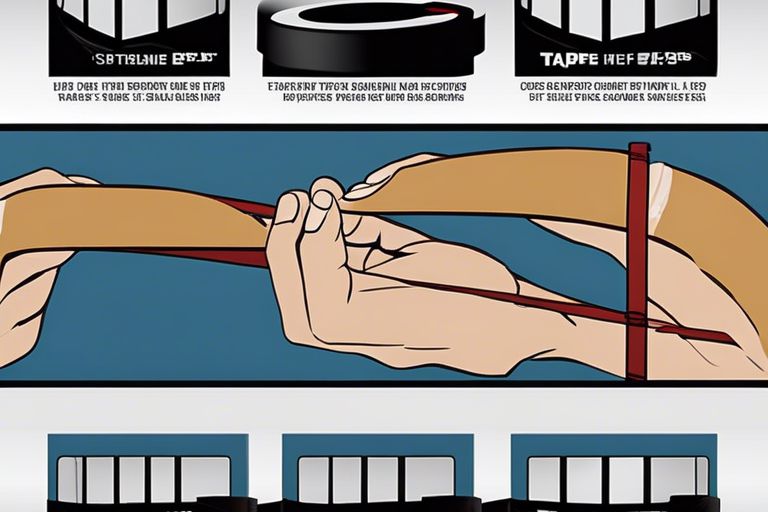
Basic Taping Techniques
Keep in mind that effective taping can make a significant difference in your climbing performance and injury prevention. Taping techniques vary based on individual needs, the specific type of climbing you engage in, and the level of support required. Whether you’re looking to provide general stability to your fingers or support an injury, understanding the right techniques will help you get the protection you need.
Taping for General Support
An effective way to tape your fingers for climbing is to provide general support. This technique is ideal for those who are looking to enhance their grip strength and maintain stability without any specific injuries. Start by using a strip of athletic tape about 1 inch wide, tailored to the length of your fingers. Wrap the tape around the base of your finger and secure it without constricting blood flow. Then, extend the tape upwards, creating a figure-eight pattern over the knuckles and back down to the base. This method helps prevent excessive movement of the joints while allowing enough flexibility for gripping holds.
Additionally, you may consider overlapping the tape by about half its width to ensure comprehensive coverage and support. Applying a supportive structure around your fingers can significantly reduce strain during climbs, allowing you to perform to the best of your ability. Remember to check your circulation; if your fingers start to tingle or turn colors, you may need to loosen the tape.
Taping for Specific Injuries
Assuming you are dealing with an existing finger injury, taping for specific injuries requires more precision. Each injury has its unique characteristics, whether it’s a sprain, strain, or tendon issue. Begin by assessing the area of injury to determine where the tape will provide the most benefit. Depending on the nature of the injury, you might want to use a combination of anchor and support strips. Anchoring the tape at the base of the finger will help secure any loose tendons, while additional support can be focused directly over the injured area to minimize movement.
Your taping method may also involve creating a “buddy tape” technique, where you tape the injured finger to a neighboring finger for additional support. This helps immobilize the injured digit, allowing it to heal while still providing some flexibility for climbing activities. Always consult with a professional for optimal techniques tailored to your specific condition.
To enhance your taping for specific injuries, it’s advisable to research the most common injuries that climbers face, such as pulley injuries or tendon strains. Knowing these nuances helps you use the tape effectively to alleviate pressure and provide necessary stabilization during climbs.
Methods for Easy Removal
Taping your fingers can be a straightforward process, but removing the tape can sometimes pose a challenge. To make this step easier, it’s crucial to use high-quality, skin-friendly tape that can come off gently. When you’re ready to remove the tape, work slowly and carefully. Start by loosening one end of the tape and peel it back at an angle. This method reduces the risk of skin irritation and allows for a smoother removal experience.
Moreover, using warm water to dampen the tape can help in loosening the adhesive, making it easier to slide off without tearing your skin. This method is particularly useful if the tape has been in place for several hours and has become difficult to remove entirely. Always ensure you assess the skin’s condition after removal—this will help prevent any unnecessary damage or irritation.
Basic knowledge of proper taping techniques is imperative for climbers who want to maintain their performance while minimizing the risk of injury. Remember to consider the individual needs of your fingers and the specific challenges that each climb presents. With practice, you will find a routine that works best for you, making the process more efficient and effective.
Advanced Taping Strategies
After you’ve mastered the basics of finger taping for climbing, it’s time to probe into some advanced strategies that can enhance your performance and protect your hands even further. These techniques can be vital, especially during demanding climbing sessions. Here are some advanced taping strategies you might consider:
- Utilizing Finger Splints for Extra Support
- Combining Taping with Other Injury Prevention Techniques
- Adjusting Tape Width and Layering for Customized Fit
- Understanding Tension and Adhesion for Optimal Support
Advanced Taping Techniques Overview
| Technique | Description |
|---|---|
| Finger Splints | Use finger splints to immobilize and support injured fingers, allowing them to heal properly. |
| Hybrid Techniques | Combine tape and finger splints for added support while climbing. |
| Customized Tape | Adjusting the taping technique based on individual hand shapes and conditions. |
| Tension Adjustments | Utilize varying tension levels in your tape application for optimal grip support. |
Finger Splints and Hybrid Techniques
While traditional taping can provide significant support, finger splints offer an extra layer of protection, especially for fingers that are already injured or at risk of injury. By immobilizing the affected finger, you can prevent further damage while still allowing for some range of motion in your other climbing fingers. Combining splints with tape can create a hybrid approach that optimizes your grip and prevents strain on vulnerable areas.
While finger splints support injured fingers, properly taping your other fingers will ensure they remain agile and functional for climbing. By applying tape to the surrounding fingers, you’re able to maintain your climbing style without sacrificing support. This combined method can be especially effective for those who regularly push their limits on challenging climbs.
Taping for Crimp Grip vs. Open Hand Grip
If you predominantly use a crimp grip in your climbing, you’ll want to focus on taping techniques that support the joints of your fingers during strenuous maneuvers. Crimping places significant stress on the finger tendons and joints; therefore, proper tape application can help prevent overstretching and injuries. For an open hand grip, a lighter taping technique is generally more suitable, allowing for increased finger mobility while providing some level of support.
The distinction between these two grips is crucial when considering how to tape effectively. When crimping, you should apply the tape to reinforce both the distal and proximal joints of your fingers, while maintaining sufficient flexibility. On the other hand, for open hand grips, focus on taping the base of the fingers for stability without hindering their natural movement. Take time to assess your climbing style and adjust your taping method accordingly for optimal performance and injury prevention.
Customizing Tape for Individual Hands
Even within standardized taping techniques, everyone’s fingers have distinctive contours and strengths. As you gain experience in taping your fingers, you may find that customizing your taping method is vital for maximizing comfort and support. Adjust the width, tension, and layering of the tape to create a fit that caters to your individual hands and climbing style. This customization is not just about enhancing performance but also about preventing injuries in the long term.
With practice, you’ll figure out the application techniques that best benefit your anatomical structure. Everyone’s fingers have unique needs, so no two tapes will look the same. Take time to experiment with different styles and techniques until you find the most effective combination for your fingers, ensuring you maintain both performance and safety while climbing.
Tips for Effective Taping
To achieve the best results when taping your fingers for climbing, keep the following tips in mind to optimize your technique and ensure durability throughout your climbs:
- Use a high-quality, athletic tape designed for climbing.
- Make sure your fingers and hands are clean and dry before applying the tape.
- Wrap the tape snugly but not too tightly to avoid restricting blood flow.
- Consider your specific needs – whether supporting an injury or preventing one.
- Practice the taping technique on your own fingers to improve your skills.
Recognizing proper taping procedures can enhance your climbing experience and help you stay injury-free.
Common Mistakes to Avoid
Little adjustments can make a significant difference in how effective your taping is. One common mistake is not cleaning your hands thoroughly before applying tape, which can lead to poor adhesion. Additionally, wrapping the tape too tightly may cause discomfort or inhibit circulation, while wraps that are too loose won’t provide the necessary support.
Another frequent error is neglecting to consider your unique finger anatomy and climbing style when deciding how to tape. Customizing the amount of tape used and the wrapping technique you choose is crucial for optimizing support and comfort during your climbs.
Ensuring the Right Tension
Even slight variances in tension can affect the effectiveness of your taping. The goal is to find a balance between providing support and allowing for enough flexibility in your fingers. You should aim for a snug fit that helps stabilize joints without being overly restrictive. Pay attention to how your fingers feel as you wrap them, making adjustments as needed.
Mistakes in tension can lead to ineffective support or discomfort during climbing. Therefore, it’s important to frequently assess how your fingers are responding to the tape. If you notice any tingling or numbness, it may be a sign that the tape is too tight and needs adjustment.
When to Re-Tape
Tips for when to re-tape include keeping an eye on the wear and tear of your tape during climbing sessions. If you notice that the tape is starting to fray, peel off, or loses its grip, it’s time for a fresh wrap. Additionally, if you experience any pain or discomfort while climbing, re-evaluating your tape application may be necessary.
Common indicators that you need to re-tape include visible signs of damage or changes in the feeling of support. Listening to your body is key; if you start to feel discomfort or instability in your fingers, don’t hesitate to stop and reapply the tape for optimal protection and support.
Factors to Consider for Optimal Taping
Despite your best efforts, tape alone won’t provide the support you need without carefully considering several key factors that influence its effectiveness. Here are some vitals to keep in mind:
- Climbing Style
- Duration and Type of Climbing Activity
- Weather Conditions and Hand Moisture
- Your Personal Preference and Experience
Perceiving these elements will help you maximize the benefits of taping during your climbing sessions.
Climbing Style and Its Effect on Taping
For different climbing styles, the type and amount of finger and hand stress varies significantly. Sport climbing may require more dynamic movements, implicating the need for more rigid taping techniques, especially on the crux sequences. In contrast, bouldering involves shorter but more intense bursts of activity, which can influence how you tape various finger joints to ensure maximum support during those explosive moves.
Furthermore, traditional climbing relies on prolonged grip durability; thus, lighter taping may be more appropriate since it allows for greater flexibility. Understanding your climbing style is vital for tailoring your taping technique in order to achieve optimal finger support while maintaining your dexterity and grip strength.
Duration and Type of Climbing Activity
You also need to think about how long you will be climbing and the type of activity you’ll be engaging in. If you’re only venturing out on short climbs, a basic tape job may suffice. However, for longer sessions or multi-pitch climbs, you might want to consider more robust taping methods that offer greater support and protection over time. Keeping in mind the specifics of your climbing activity will ensure you can adequately prepare your fingers for what’s ahead.
For instance, if you expect to be on the wall for several hours, you may want to tape more conservatively to allow some level of mobility while still providing protection. This balance can help minimize injury risk while giving your fingers the support they need to endure through the climb.
Weather Conditions and Hand Moisture
Duration and thin, sweaty hands can drastically affect the performance and adhesion of tape. Climbers often face various weather conditions, whether it’s the humidity of summer or the dryness of winter, which can impact how well the tape stays in place. On hot days, sweat can create a barrier, causing the tape to peel off prematurely, while cold dry conditions may make your skin more susceptible to abrasions, requiring more careful taping for protection.
With fluctuating weather, it’s vital to choose a tape that grips well even under moisture. Utilizing pre-taping skin preparation methods, such as cleaning your hands and possibly applying chalk before tapping, can significantly improve the tape’s longevity and effectiveness during your climbing sessions.
Final Words
As a reminder, taping your fingers properly is an important skill that can enhance your climbing experience and protect your hands from injury. By understanding the anatomy of your fingers and the common areas that require support, you empower yourself to mitigate the risks associated with climbing. With practice, the taping technique will become a seamless part of your preparation routine, allowing you to focus more on your climb rather than potential discomfort or pain.
Ultimately, investing time in learning how to tape your fingers effectively can improve your grip and endurance on various climbing routes. Always ensure that you have the right materials and approach each taping session with attention to detail. With the right technique, you not only enhance your performance but also ensure that your fingers remain protected and capable of tackling any climb you desire. Note, your hands are your most important tools in climbing, so take the time to care for them properly.
FAQ
Q: Why should I tape my fingers for climbing?
A: Taping your fingers can provide support and protection for your tendons and joints during climbing. It helps prevent injuries caused by repetitive stress and can also protect cuts, abrasions, or blisters that may occur while gripping rough surfaces. Properly taped fingers can enhance grip, give additional stability to the joints, and may even boost your confidence on difficult climbs.
Q: What materials do I need to tape my fingers for climbing effectively?
A: To tape your fingers for climbing, you will need a few basic materials: climbing tape (which is usually a durable athletic tape) or medical tape, scissors for cutting the tape, and optionally, a gauze pad if you are protecting an injury. Make sure your tape is breathable and strong enough to withstand the rigors of climbing. Having a clean and dry surface is also important for the tape to adhere properly.
Q: How do I tape my fingers for climbing to ensure maximum support?
A: To tape your fingers effectively, follow these steps:
1. Clean and dry your fingers to ensure good adhesion of the tape.
2. Cut a piece of tape long enough to wrap around the base of the finger and cover the joints.
3. Start by wrapping the tape around the base of your finger (the joint closest to your hand) to stabilize it.
4. Carefully extend the tape upwards, wrapping around the middle and tip joints as needed, depending on the level of support you want.
5. Avoid wrapping too tightly as it may restrict blood flow or movement.
Always remember to test your finger mobility after taping and make adjustments if necessary.